Intro to JavaScript for Web development
As you may already know, JavaScript along with HTML and CSS is a great part of web development. You should already know that HTML is the skeleton of any website. CSS is for styling purposes. JavaScript is for website behavior. Also, there are many JavaScript frameworks such as “React”, “Vuejs”, and “Angular”. You are going to learn later about these frameworks. This tutorial is an introduction to JavaScript web development. This is an introduction because we need to continually learn JavaScript every day as web developers; even if we are experts. Let’s start learning Javascript. In case you already have some knowledge, this is a good opportunity to sharpen your skills. Let’s have fun.
What really is JavaScript?
JavaScript is a programming language used for web. scripting. Most websites have JavaScript in their front-end. Besides Scripting nowadays JavaScript is an all-purpose programming language. JavaScript is great for development on the server-side. We can use JavaScript in mobile development. JavaScript is great for all programming needs.
Adding JavaScript to HTML
It’s quite easy to add JavaScript to HTML. We only need to add the <script> tag to our HTML. Once we add the <script> tag to our HTML we can add our Javascript code. There are two ways to add Javascript code to our scripts. One of them is adding Javascript code inside the tags. The other is to add the “src” attribute to the <script> tag. Then the value of the src is the file URL. We show you a brief example. This example shows how to add code to our scripts.
<html lang="en">
<head>
    <title> My Site</title>
</head>
<body>


    <script>
     //JavaScript Code goes Here
     // First way to add Javascript
    </script>
</body>
</html>
<html lang="en">
<head>
    <title> My Site</title>
</head>
<body>


 <script src=" URL_JavaScript_File">
 </script> <!--Second way to add JS code -->
</body>
</html>
The previous example shows how to add JavaScript to HTML. Most developers prefer the second way to add JavaScript Code. That’s because the same script can be used by many HTML Documents. We call it “Reusable Code”. That is a good practice while coding or programming in any language. The File extension of JavaScript is “js”.
Document Object Model (DOM)
The document Object Model (DOM) connects the website to the scripts. The DOM is the structure of the document. In this case the HTML.
JavaScript Structure
As we said above Javascript is a programming language. We can use JavaScript for all our programming needs. In this tutorial, we focus more on front-end web development. That is traversing the DOM. Although we focus on traversing the DOM, we have many other things in the JavaScript language that we need to get through.
JavaScript Comments
Comments in most programming languages are similar. In JavaScript, we can add single-line comments using two slashes (//). We can also add multiple line comments in JavaScript using a slash and an asterisk to open the statement, and an asterisk and a slash to close it.
// This is a single line comment

/* This is how
   we show multiple
   line comments.
   using a slash
   and a star
*/
Data Types List
All Programming languages have data types. I don’t know if you read “The Key to learn all programming languages”. That is a great foundation for all programming languages including JavaScript. Here we show you a list of data types that most languages implement. JavaScript is not the exception. The following list is a list of Datatypes.
- Numbers
- Strings
- Characters
- Booleans
JavaScript Data Type
Just like all the other programming languages, JavaScript has its own data types. In JavaScript, we can declare any data type only using three words. Not like the other programming languages that we need to declare the data type with its keyword. The three words we need in JavaScript are “let”, “var”, and “const”. There is a brief example of how to declare any data below.
let myBool = false;
const myNumber = 50;
var myString = "Hello World!";
Let” Keyword
Declaring data with the “let” keyword is very common. The let keyword declares data that is constant but can change after some programming. The example below shows how a number changes after a boolean is declared “false” or true.
let myNumber = 5;

var myBool = false;

if (!myBool)
    myNumber = 3;
else
myNumber = 5;
console.log(myNumber);

3 // Result can change after some programming.
Const Keyword
The “const” and “let” keywords are similar to declare variables. Their only difference is that “const” never changes. That is a permanent constant. Let’s see the same example now using the “const” keyword.
const myNumber = 5;

var myBool = false;

if (!myBool)
    myNumber = 3;
else
myNumber = 5;
console.log(myNumber);
TypeError{ Attempted to assign to readonly property. } // Outputs Error
// Const never changes
Var Keyword
The “var” keyword is a variable, variables can change. A few years ago that was the only keyword used in JavaScript. Later the “let” and “const” were added for the purpose of more clear code. Here you have the same example declaring the number with var. As “var” can change we don’t have any errors as result.
var myNumber = 5;

var myBool = false;

if (!myBool)
    myNumber = 3;
else
myNumber = 5;
console.log(myNumber);
3 // Result
JavaScript Operators
As in all the other programming languages, there are operators in JavaScript. Here we provide you with an example of the most used JavaScript operators.
| Operator | Symbol | Usage |
| Plus Operator | + | Addition and string concatenation |
| Minus Operator | – | Subtraction |
| Multiplication Operator | * | Multiplies |
| Division Operator | / | Divides |
| Modulus Operator | % | Divides two numbers and return remainder |
| Assign Operator | = | Assign values |
| Equal Operator | == | Two variables equal |
| Identity Operator | === | Two variables Identical |
| Increase Operator | ++ | Adds 1 to any number |
| Decrease Operator | — | Subtract 1 to any number |
| Less Than | < | Compare number less than |
| Greater Than | > | Compare number greater than |
| Less or equal | <= | compare numbers less or equal |
| Greater or Equal | >= | compare number greater or equal |
| Not Equal | != | not equal |
| Boolean AND | && | Logical AND |
| Boolean OR | || | Logical OR |
| Boolean NOT | ! | Logical NOT |
These are the most useful operators in JavaScript. We have the ability to combine them to realize some operations. We are showing a brief example below so you can see how we can do it.
let  a = 5;

a+=3;
console.log(a);

8 // Result

// We first Initialize a = 5
// Then we combine the operators "+="
// The combination of these two operators will result in "a = a+3"
// Then will assign the new value of "8" to the variable "a"
//We can combine  all math operators to operate we want
JavaScript Statements
In JavaScript, we use statements all the time. Sometimes statements are crucial in JavaScript. As you can imagine we use most of the statements in JavaScript. We use to traverse the DOM. The most used statements in JavaScript are; “if” statements with the else clause, “while” statements, “do while” statements, and “switch” statements. They are similar in all the other programming languages. Here we also show you a brief example of some statements.
let b = 15;

if (b <= 15)
    console.log("Your Number is", b);
else
  console.log('Your number is too small');
Your Number is
15
var grade = 65;

while(grade > 60)
   console.log('You Passed');

/* This code outputs " You Passed"
Infinitely. We only show it here as quick example. Once we get to the DOM we are
going to use the while statement for other purposes.
The two examples we show above are only for console demonstration. We showed examples with the “if” and “while” statements. Later we are going to see these kind of examples applied to web pages. As you may know the “do while” statement is similar to the “while” statement. Its only difference is that “do while” performs at least once in case the condition is not met. “Switch” statements instead are like a chain of the “if… else” Statements.
JavaScript Arrays
As many other programming languages, JavaScript implements arrays. We can create arrays in JavaScript using square brackets “[……]”. As you may also know, an array is a set of data. The size of the array is the number of elements it contains. The index of any element of the array is the position it has. Index starts with 0 and continues.
let oddNumbers = [1,3,5,7,9];  // Array has 5 elements where oddNumbers[0] = 1

let fruits = ['apple', 'orange', 'bananas','pears' ]; // fruit[1] = 'orange'

console.log(oddNumbers[0]);
console.log(fruits[2]);
1
bananas
JavaScript Loops
In JavaScript we also have loops. The most used loops in JavaScript are the “for” loop and the “forEach” loop. Most of the times these loops are very useful in arrays. Let’s show you some examples.
For Loop
The “for” loop is one of the most well-known programming loops. We create a “for” loop using the keyword “for”. Then in parentheses we initialize a value, set a condition, and perform the operation. The Increase operator is very useful in “for” loops. The example below shows how to implement the “for” loop.
let oddNumbers = [1,3,5,7,9];

for(i=0; i<= oddNumbers.length; i++){
    i = oddNumbers;
    console.log(i);
}
Array(5)[ 1,3,5,7,9 ] // Result we get the same Array...
Foreach Loop
The foreach loop is somewhat different. To implement the “foreach” loop in JavaScript we need to declare a function. The first thing we need to do is to type the array number. Then the “foreach” keyword and after we declare a function with a parameter. We can name the parameter as we want. Although we can name the parameter as we want, that parameter will have the value for each item of the array. Here we show you another brief example of how to implement the “foreach” loop.
let fruits = ['apple', 'orange', 'bananas','pears' ];

fruits.forEach(function(fruit){
   console.log(fruit);

});
apple
orange
bananas
pears

//outputs each fruit
JavaScript Functions
We can easily declare functions in JavaScript. To declare a function we only need to type the word function. After we type the word function we declare the name of the function. If the function needs parameters we type them inside parentheses. If not we can leave the parentheses empty. Then we type our code in curly braces. The example below shows a function which add two numbers.
function sum(a,b){
   return  a + b;
}

console.log(sum(4,3));
7 // Result
The Example above shows the sum of two numbers. We declare a function called sum. Then we added the parameters “a”, and “b”. That function returns the sum of the numbers. After the. function declaration we called using a log in the console. Well, I did not mention before that we can call a function just by typing it and its parameters somewhere in our code.
 function subtract(a, b){
     return a-b
}

subtract(3,4);
// Calling the function subtract.
“This” Keyword
Sometimes the “this keyword is used in functions in order to specify the parameter as value. In some functions or objects we have something called a constructor. The constructor of any function contains its parameters. We use the keyword “this” to declare the variable specifically. We show you a brief example below about the “this” keyword.
function getArea( width, height){
    var Width = this.width;
    var Height = this.height;

     var Area = Width * Height;

     return Width;
}
JavaScript Operations with Strings
As you may already know, a string in programming is a set of characters. Concatenate two strings is to add two strings and get a new one. Besides concatenation there are also many JavaScript pre-built functions for strings. We show you some of these functions below.
// Here we show you some of the most used string functions

let S1  = "Hello";
let S2 = "World!";

let myString = S1 + S2 // string concatenation ... Returns Hello World!

let myString2 = "Hello" + "World!" // Another way to concatenate Strings

let myStringSize  = myString.length;

let S3 = myString.toLowerCase(); // String in lower case "hello world!"
let S4 = myString.toUpperCase(); // String in upper case "HELLO WORLD!"

let S5 = myString.substring(0,4); // Create the new String "Hello"
let S6 = myString.trim();  //Removes white space   S6 = "HelloWorld!"
let S7 = myString.IndexOf('ll');   // The position of ll is 2... Remember the first index of a string is 0
let S8 = myString.replace('ld','n'); // Replace the first part of the declared parameter with the second.
// In this case the new string would be  "Hello Won!"
Global Number Functions
We saw above some functions for strings. These functions are global because they can be used by any string in JavaScript. We also have some global functions for numbers. Here we also show you some of the most used ones.
 let  A = 3
    if(A.isNaN())
    return  "Not Valid";
    else
     return A;

 // isNaN() means is not a number. A is a number so the code will return 3.


let Pi = 3.14159265359

  myPi = Pi.toPrecision(3);   // Returns 3.14   The precision of  a number in JavaScript includes the main number.


var Pi = 3.1415192;

myPi = Pi.toFixed(2);  // Also returns 3.14  The function toFixed() only works with decimal number


// Global Functions Below

Math.round();  //Rounds number to nearest integer
Math.sqrt(); //Returns  The square root of a positive number
Math.ceil();  // Rounds number up to the nearest integer
Math.floor() // Round number down to the nearest integer
Math.ramdom() // Generates a random number between 0 and 1... Including
JavaScript Objects
The previous example showed how to declare a function in JavaScript. A JavaScript Object is like a type of data that we can create. A JavaScript object can hold variables and functions on its own. It’s quite easy to create an object in JavaScript. We only need to declare it how we declare any variable or constant. Then in curly braces we declare our properties. We show you below a brief example of a simple JavaScript Object.
let Address = {
  streetAddress: '123 Main Street',
  city: 'Chicago',
  state: 'IL',
  zip: 60176

}

console.log(Address.streetAddress);

123 Main Street // Result
We created an object with some “mock values” just for sample purposes. Once we have a website with a database and inputs values can change for any object in JavaScript. In order to call a property of any object, we only need to type the name of the object followed by a dot (.) and the name of the property. The example above shows the “street address” that is an property of the “Address” object.
DOM Introduction
I think we now got enough information to begin with the DOM. Now we are going to continue learning JavaScript; but now it’s going to have effect on the website. You are going to see how to implement everything we saw above in a website. Also we are going to learn a lot more about JavaScript. Let’s Continue.
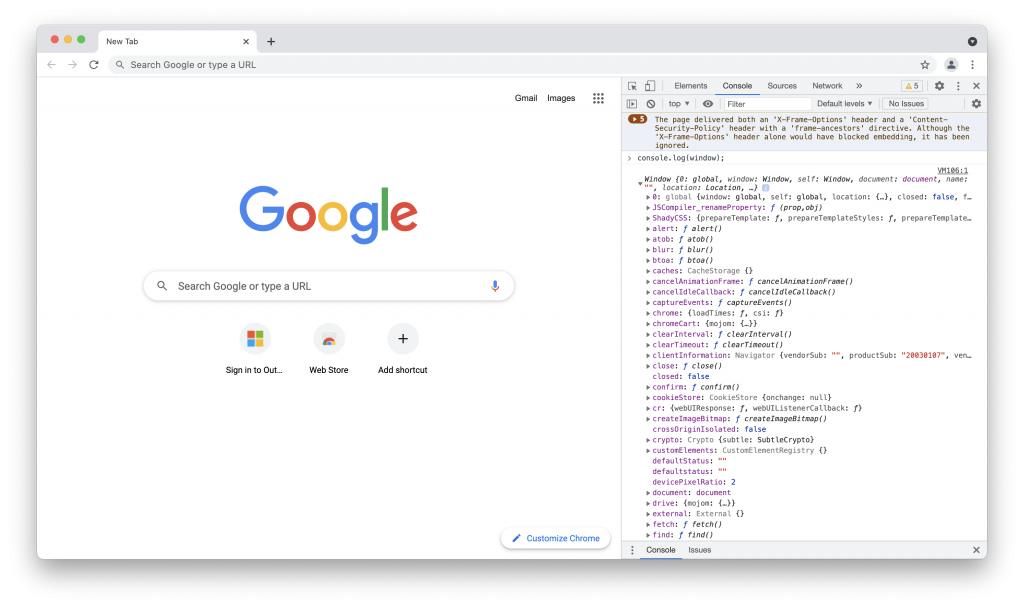
The JavaScript ‘Window’
As you may already know, there are many browsers available. The most popular browsers are “Microsoft Edge”, “Safari”, “Opera”, “Mozilla Firefox”, “Google Chrome”, etc. In Google Chrome we have the advantage of using developer tools. The “window” in JavaScript is the container of everything. All JavaScript functions are children of the window. In other words, the window is the browser. Below we show you an image of Google Chrome displaying all the functions of the JavaScript window in a console log.

Window Resizing
As you could see in the example above. All the JavaScript native functions are children of the window class. We have the ability of resizing the window using the “resizeTo ” function. We showed you before how to call a function in JavaScript. In order to resize the window we can type the code you see below. You can try it by yourself in your browser. The result will be the resizing of the browser.
window.resizeTo(width, height);


//width and height most of the times are in pixels.
//Some browsers have disabled that function; but you still can try.

/***************************************************************************/
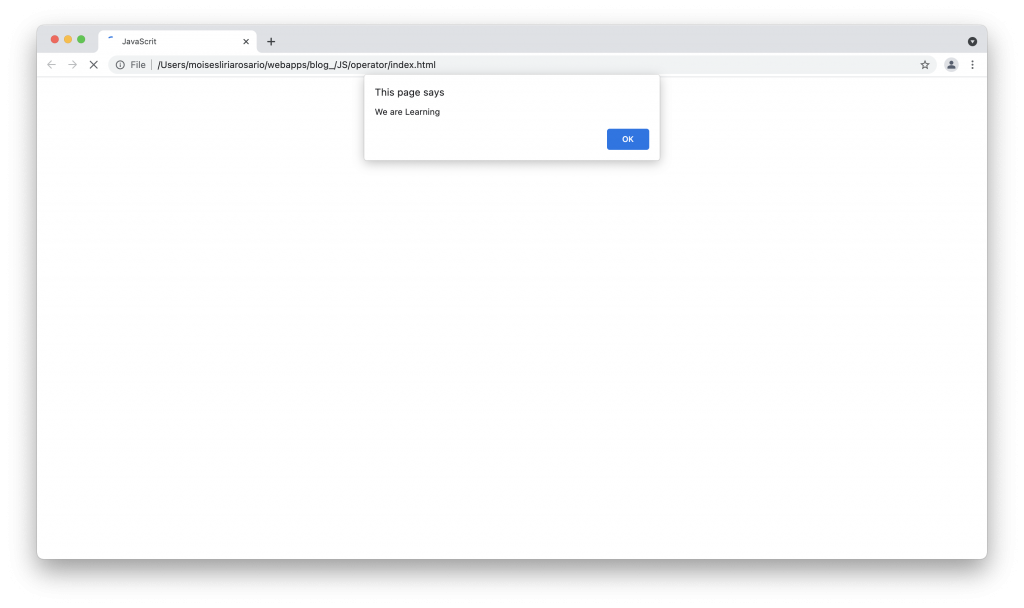
JavaScript Alerts
An Alert in JavaScript is one of the “window” functions. To call a window function we don’t need to call window each time. We only need to call the function. An alert is going to alert users of something that could happen. In JavaScript we can create alerts by only typing the function and the string alert in the parameter as we show you in the example below. We show you an image of the alert because if we use Codepen the alert could stop your browser.
alert("We are Learning");
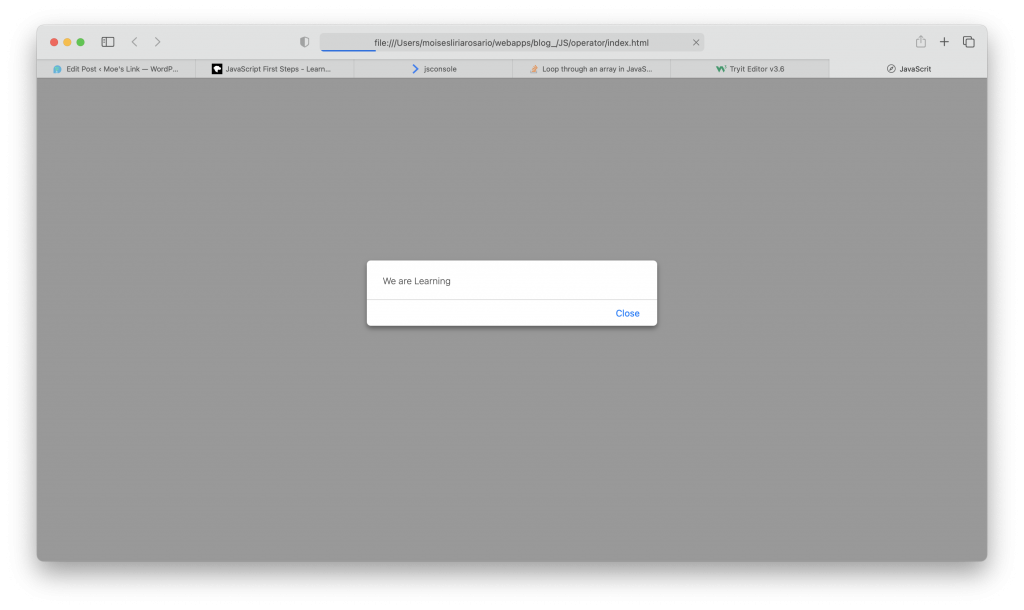
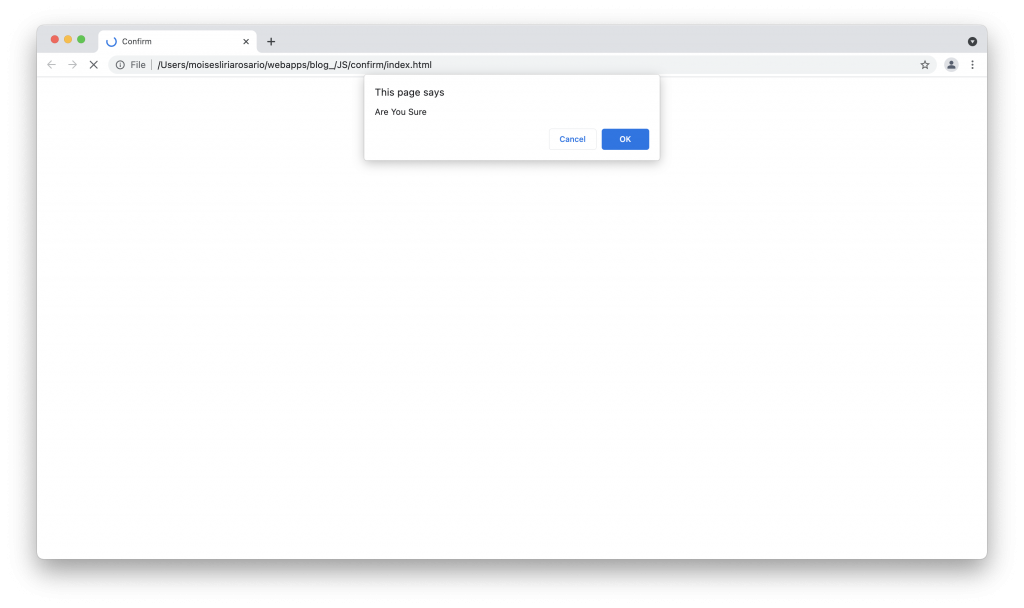
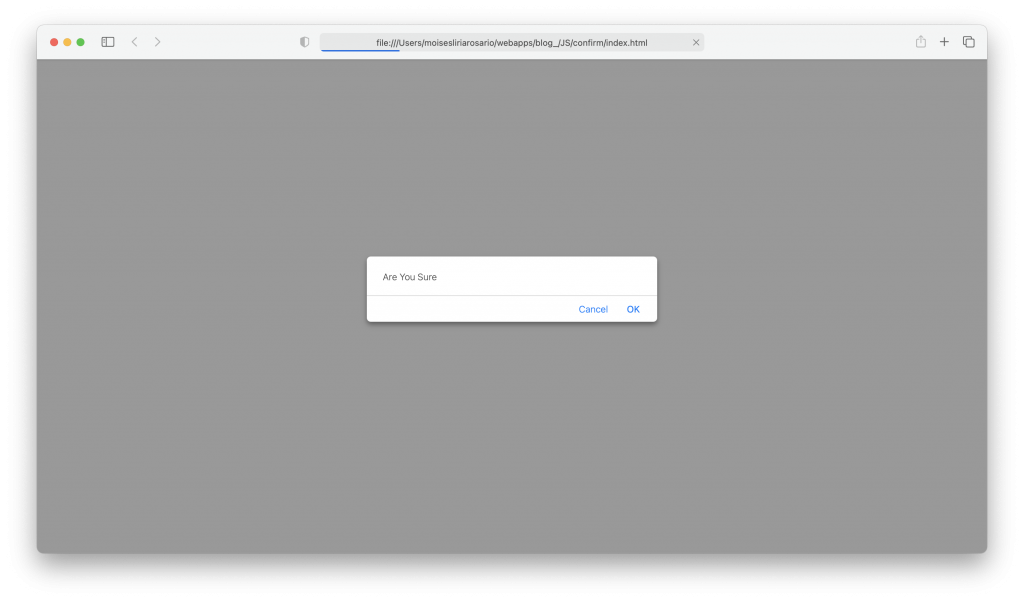
Confirmations
We are also able to ask users if they are sure of something. That is possible using a window “confirm” function. If the user confirms the answer the function is going to proceed. If user denies access the function is going to stop. We are also going to show some pictures of a confirm function itself. Later we are going to implement them in real things.
confirm("Are You Sure");
// This is the most basic example for a confirmation inn JavaScript
JavaScript Writing in the browser
It’s possible though not very common to write in the browser using JavaScript. To write any text in JavaScript we only need to use the Document Write Function. It’s nov very common but here we show you a brief example of how to start traversing the DOM. As you can also see, you can use HTML Tags inside the function.
Creating Data from HTML
We saw above in the two previous examples how we can start working with browsers. Now we are going to create data straight from HTML. There are many possible ways of creating data for the DOM. As we already know we have tags and attributes in HTML. You may also know that two of the most useful attributes in HTML are the “ID” and “class” attributes. The Document Object Model has many methods to create data from HTML. Some of the most known methods are:
document.getElementById();
document.getElementsByClassName();
document.getElementsByTagsName();

// Three common methods to create and modify data from HTML in JavaScript
Get Element By ID
We could see above three of the most common methods to create and modify DOM data using JavaScript. One of the method is getting the element by ID; Below we show you a brief example of how to modify some style in the DOM. We only created an empty box in HTML. Then. we added some style in CSS; but we did not add any class. As you can see we could create the class and add some text from JavaScript. In this example we used the JavaScript function “innerHTML” to add text
Get Elements by Class Name
It’s also possible to create elements using the JavaScript class attribute. As you may already know, we can assign the same class to many HTML elements. This method returns a “Node List”. A Node List is a list that its first element is 0 and continues increasing; it’s similar to an array. This method looks similar to the “getElementByID” method; but it’s quite different. Here we provide you with another example that shows how we can create many elements at once in JavaScript. In this example we also modified the style of many list items.
Get Elements by Tags Name
Another JavaScript method to create and modify data is the “getElementsByTagsName. This method also returns a node list. It’s similar to getting elements by class name. The difference between them is that one takes elements by class names, and the other by tag names. In case we have many <h1>s or <p>s. All the HTML Tags can be called by this method. Sometimes it could cause some confusion if the website is too large. Here there is another example using this method.
Handling Data with Query Selector
Besides the three methods mentioned above, there are many other methods to create and handle data in JavaScript. One of these methods is the query selector. This method is very popular among developers. Query selector uses the CSS selector. In case we have a paragraph we use the selector “p”. If we have a class or ID we use the dot (.) or pound sign (#) respectively. In order to handle data using the query selector method, we only need to type the “querySelector” keyword ; then we need to put the selector in parentheses. Once we do that we already created the data from HTML, and it’s time to handle data. We show you a brief example below.
Select all Queries
There is a little problem with query selectors. The problem is that query selectors only chooses the first recognized selector and dismisses all the others. In cases that we want to choose many elements with the same class; Or several selectors of the same type, with query selector it’s Impossible. In order to solve this problem we have the option of selecting all queries. That is possible using the keyword “querySelectorAll”. Remember that selecting all queries is not going to create a single element; it’s going to create a node list. Also remember that you are going to be working with CSS Selectors. For that reason if we have more than one parameter the last one will be chosen by default.
Generating Elements
We can also create elements in JavaScript using the “createElement” function. The elements we create directly in JavaScript will not be displayed at first in HTML. There are some built-in functions to add them to HTML. The most common functions are “appendChild” and “prependChild” The function appendChild is going to add element after the last element. The function prependChild is going to add it before the first element. The following example shows the same list we saw in the previous example. We created another element, then we created its text content (Text Node), and after that we Inserted to our HTML using the appendChild function.
JavaScript Events
By now we have learned a lot about JavaScript. We learned some of the basics of the language, and also we learned how to get JavaScript Elements to the DOM. The bases for website behavior are JavaScript events. JavaScript events are the ones responsible to deal with user interaction and website reaction. As you already know, Websites should be prepared for user interaction. If there is no good interaction of the user with the website; the user won’t be back. There are too many events that we cannot list them all in this tutorial. Here we provide you a list of events from the JavaScript MDN. You will get great reference from there. In plain JavaScript the keyword for events are in lower case. Events such as “onclick”, “onmouseover”, “onsubmit” “onload” etc. Let’s give you some examples about these events.
On Click Event (onclick)
The “onclick” event is as its name implies. Once the user clicks on the content, the website will have the reaction instructed. Below we can se an example of how to change color on click.
Adding Event Listeners
The example above is the most basic example of an “onclick” event. You can see that once you click on the button text color changes. That’s a great reaction; but it’s a programming malpractice. As you may see there is a change in the color; but you won’t have the ability to change it again. If you add another button with another function you can change it to another color or do something else; but it won’t never change again.
The best practice for JavaScript events is to add event listeners. Event listeners call functions and functions can accomplish tasks. Once we create functions we can call them again or call another function with another event listener. In order to add action listeners to HTML elements, we only need to add its function. After the property we type the keyword “addEventListener”. Then we type the name of the event in quotation marks, and the callback function separated by comma. The example below shows the same example you saw above with event listeners. We also added some style and other buttons so you can see the changes
On Mouse Over Event (onmouseover)
The “onmouseover” event is also as its name implies. Once we place the mouse over our content, the content will realize what we have already instructed. The example below also has some text. When we place the mouse over the text, it’s going to change color and size as a magnifier. We also added the “onmouseout” event. The “onmouseout” event is not so needed; but we can specify any action once we move the mouse out. As you can see in the following example, we also implemented event listeners. They are very useful for event handling in JavaScript.
The On Submit Event (onsubmit)
Another very useful event in JavaScript is the “onsubmit” event only works with forms. When we submit a form the event can perform the action we want. We need to remember that we handle HTML forms most in the back-end of the website. Also forms create data to store in the database. That is beyond the scope of this tutorial; but in another tutorial we show you how to deal with databases. We show you an example of the “onsubmit” event here just for front-end purposes. As you may see there is a form that requires a name. The form confirms the name, and then proceed to insert the name entered to HTML. Remember again, No dealing. with databases.
As we said above, there are too many events that we cannot really explain them all in this tutorial. The JavaScript MDN lists a lot of events and their references. Here you have. a great idea of how to deal with JavaScript events.
JavaScript Plugins
JavaScript plugins are nothing else than many pieces of JavaScript code that we can implement in our sites. Plugins are created by other developers and are available online. You can also create your own plugins in order to reuse code. JavaScript Plugins make life easier to developers.
Camel Case
As you have already seen, some JavaScript keywords come from many words together. As you can also see the first word starts with lower case, and all the following words in upper case. That format is called camel case. Using camel case in our variables is very useful in programming. Camel case can be used in all programming languages, and it’s a great practice in programming. That is because once we create a variable using camel case we get reference automatically.
 var myNumber = 75;   // Camel Case...  Good Practice

 var x = 50;   //  It's ok but more confusing. in programming
Where can I place my Scripts
For any HTML document, we can place scripts in the body or in the head of the document. The best practice is to place them in the bottom of the body. Just before the closing body tag. It’s better to place them there because in the case that script does not load website is not going to stop. If we place the script in the head of the website, if the script does not load the website won’t load.
JavaScript Frameworks
There are also many JavaScript Frameworks which are very useful for all programming needs. We have JavaScript Frameworks for front end website development such as “angular”, “react”, “vuejs”, and many others. We also have some back end framework for back end purposes. One of the most popular JavaScript back end purposes is “Nodejs”. There are also many mobile development frameworks based on JavaScript. One of them is the “React Native”. There are many others not listed here. Here we listed some of the most popular. Browsing online you can find a lot more.
JavaScript Object Notation (JSON)
JavaScript Object Notation is very useful to handle data using JavaScript Object. It’s very easy and simple to create any JavaScript Object Notation document. We show you a brief example below about JSON. This example is only for showing purposes; dealing with data and databases is also beyond the scope of this JavaScript Tutorial. As you may see in the example below, we specify an object in JSON and then its description. The object and the description both are in quotation marks. You can find a lot more of information in the JSON Website.
 {
    "title": "myBook";
     "version": " 3.0";
     "author" : "John Doe";
     "availability": "available"

}
Conclusion
JavaScript is the main programming language for web scripting. In this tutorial we have a great foundation of the JavaScript language. As developers we need to keep learning JavaScript every day. This tutorial is only a quick start of the JavaScript Language. You can find a lot more of information and references in the JavaScript MDN. We also encourage you to read books about JavaScript to sharpen the skills you’ve already got. We hope you enjoy learning JavaScript with us. Some examples in this tutorial use this Online JavaScript Console. Some others as you may see use Codepen; a great practicing environment.